
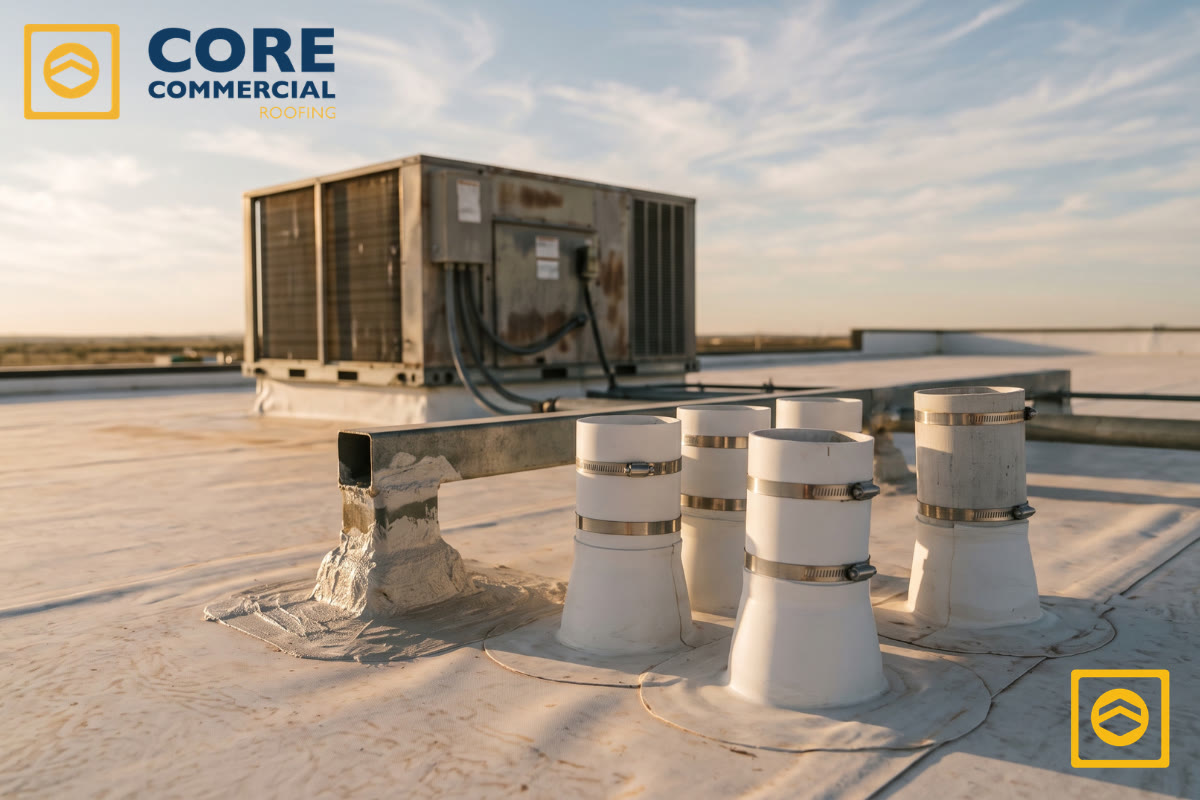
Every pipe, conduit, support and vent that passes through your roof is a planned hole in the waterproofing. On a low-slope roof, the open field of membrane rarely fails first. The places where something comes through it do. This guide covers which method fits which penetration, how a correct pipe seal is built, where pitch pans fit, what Texas code requires, and how to keep those details watertight through West Texas heat and hail.
Key takeaways
- Round rigid pipes get a prefabricated boot. Irregular shapes get liquid-applied flashing. Clusters of small conduit get a sealant pocket.
- Individual penetration flashing needs at least 8 inches of height and 12 inches of clearance from other penetrations, walls and curbs.
- Pitch pans are a last resort. They need ongoing maintenance and are often excluded from manufacturer warranties.
- Any new penetration should be flashed by a roofer who works to your roof manufacturer's details, not by the trade that cut the hole.
What counts as a roof penetration on a commercial roof?
A roof penetration is anything that passes through the roof membrane: plumbing vents, gas lines, electrical conduit, equipment supports, exhaust stacks, drains, skylights and the curbs under rooftop units. The International Building Code, Section 1503.2, requires flashing at every penetration through the roof plane.
Most commercial roofs carry more penetrations than owners expect. Each rooftop unit brings a gas line, condensate line and electrical feed. Each restroom brings a vent stack. Every tenant buildout, sign, antenna, camera or solar array adds more.
Penetrations are one of several flashing families on a low-slope roof. Walls, parapets, edges and curbs have their own details, covered in our guide to commercial roof flashing types and failures. This article focuses on the pipes, conduit and supports that pass straight through the deck.
Why do roof penetrations fail faster in Texas?
Texas roofs work penetration seals harder than most. Large daily temperature swings make pipes and membrane move against each other. Strong UV breaks down any mastic or sealant left exposed. Hail adds impact damage to boots, clamps and sealant in a single afternoon.
A pipe and the membrane around it expand and contract at different rates. On a roof that heats up every afternoon and cools down every night, the joint between them gets flexed thousands of times over its life. A detail that relies on a rigid bead of sealant to bridge that joint will crack open.
Sun exposure is the second problem. IIBEC's guidance on thermoplastic pipe flashing details notes that sunlight, heat and humidity degrade the butyl mastic that seals the top of a pipe boot. A bead of elastomeric sealant is required to protect it, and any butyl left exposed above the boot should be removed. Membranes age faster under the same conditions, which is why TPO roof lifespan in Texas often runs shorter than the brochure suggests.
Hail is the third. Penetrations sit above the membrane plane, so boots, clamps and the crowned sealant in pitch pans take direct hits. A penetration that looked fine in March can be split after one spring storm.
Which sealing method should you use for each type of penetration?
The shape, size, height and temperature of the penetration decide the method. Round rigid pipes 1 inch or larger get a prefabricated boot. Irregular shapes get liquid-applied flashing. Small conduit clusters get a sealant pocket. Pipes hotter than 150°F need a metal hot-pipe collar.
The thresholds in the table come from the same IIBEC guidance for thermoplastic roofs (TPO and PVC). EPDM, modified bitumen and built-up roofs follow the same logic, but always defer to your roof manufacturer's published details. Their details decide whether the work stays under warranty.
| Penetration | Best method | Key requirement | Common failure |
|---|---|---|---|
| Round rigid pipe, open top (vent stacks, gas lines) | Prefabricated pipe boot | At least 1 in. diameter, 8 in. tall, 12 in. from other flashings | Loose clamp, exposed butyl, flange crossing a seam with no patch |
| Round pipe with a closed or attached top | Field-wrapped flashing | Skilled hand-welding, clamp plus sealant at the top | Wrinkled base wrap, flashing set too high to seal |
| Square tube, I-beam, irregular support | Liquid-applied flashing | Surface cleaned and abraded; base coat, reinforcing scrim, top coat | Skipped surface prep, so the coating lets go |
| Cluster of small conduit or wires | Sealant pocket (pitch pan) | 1 in. spacing, primed surfaces, 2 in. minimum sealer, crowned | Flat or sunken sealer that ponds and pulls away |
| Hot pipe over 150°F (flues, exhausts) | Metal hot-pipe collar | Collar sized to stay below 180°F, then flashed | Membrane flashed straight onto the hot pipe |
| Rooftop unit or equipment curb | Curb base flashing and counterflashing | At least 8 in. of flashing above the roof surface | Short curbs, split corners, ponding behind the unit |
A few rules apply to every method. Wood posts should never be flashed into a roof system. Insulated pipes must be flashed directly to the pipe, with a small section of insulation removed, never to the insulation wrap. Loose wires should run in rigid conduit before they are flashed. Curbs have their own failure patterns, covered in detail in our guide to HVAC curb flashing leaks.
How do you seal a pipe penetration step by step?
A correct pipe seal on a single-ply roof uses a prefabricated boot pulled down over the pipe, butyl mastic under its top edge, a tightened stainless steel hose clamp, and a bead of elastomeric sealant on top. The boot's flange is then welded or adhered to the field membrane.
On a TPO roof, the sequence looks like this:
- Confirm the pipe qualifies. It must be round, rigid, at least 1 inch in diameter, open at the top, tall enough for the full boot without distorting it, and at least 12 inches from other penetrations.
- Clean the pipe and the membrane. Remove old sealant, dirt and oxidation so the mastic and welds bond to sound material.
- Slide the boot down over the pipe. Never slit a prefabricated boot to wrap it around a pipe. If the boot cannot go over the top, the pipe needs a field-wrapped or liquid-applied detail.
- Seat the flange flat on one plane. The flange must rest fully on the membrane and must not overlap another boot. Where it crosses a field seam, the seam gets a cover patch.
- Weld the flange to the field membrane. Probe every weld so there are no open spots along the edge.
- Set butyl mastic and clamp the top. Butyl goes between the top of the boot and the pipe. A stainless steel hose clamp compresses it into a watertight seal.
- Cap it with elastomeric sealant. Remove any butyl squeezed out above the boot, then run a bead of compatible sealant between the boot top and the pipe to shield the butyl from sun and heat.
Leave room at the top of the pipe. A boot set so high that the clamp sits at the very top of the pipe leaves no space for the sealant bead, and the butyl ends up exposed. That is one of the most common installation errors on single-ply roofs.
Are pitch pans a good way to seal roof penetrations?
Pitch pans work, but only as a last resort. The NRCA manual states that they are not the preferred method because they can become a constant maintenance problem, and most roof manufacturers take exception to them in their warranties. Use one only when a penetration cannot be flashed any other way.
A pitch pan, also called a penetration pocket or sealant pocket, is a sheet-metal box set around a penetration and filled with sealant. It earns its place around clusters of small conduit, odd shapes and wires that a boot or liquid flashing cannot reach. It loses its place when it becomes the default for every pipe on the roof.
When a pan is the right call, build it to the published detail. NRCA's penetration pocket specification describes the pocket as a minimum 26-gauge galvanized metal box at least 4 inches tall with 4-inch flanges and soldered corners. It is half-filled with nonshrink grout, then topped with a pourable sealant approved by the membrane manufacturer, with a sheet-metal rain collar over the top. On asphalt-based systems, such as a modified bitumen roof in West Texas, the metal is primed and set in mastic before it is stripped in. Some thermoplastic manufacturers require membrane-coated metal instead.
The IIBEC guidance adds the details that keep the pan from leaking later. Every penetration inside the pan should be rigid and spaced at least 1 inch from the others and from the pan walls. All surfaces are primed. The pourable sealer is at least 2 inches deep and crowned in the center so water runs off instead of sitting on top. A pan that is flat, sunken or cracked needs to be topped off or rebuilt, not caulked.
What Texas building code rules apply to sealing roof penetrations?
Texas Local Government Code Section 214.216 adopts the International Building Code as the commercial building code for Texas cities. It applies to repairs and alterations as well as new buildings. Under the IBC, flashing must be installed at penetrations to keep water out, and roof coverings must follow the manufacturer's approved instructions.
Three parts of the IBC matter most here. Section 1503.1 requires roof coverings to be installed according to the code and the manufacturer's approved instructions. Section 1503.2 requires flashing that prevents moisture from entering at penetrations through the roof plane. Section 1503.2.1 requires flashing around roof openings.
The statute sets a statewide baseline edition, and cities can adopt newer editions and local amendments. Before you add or rework penetrations, confirm with your city's building department which edition it enforces and whether the work needs a permit. Outside city limits, county and lease requirements may still apply.
In practice, the manufacturer's details are the standard that gets checked most often. They decide whether a penetration stays under warranty, and the code points straight back to them.
Who should seal a new penetration when other trades cut the roof?
A roofing contractor who works to your membrane manufacturer's details should flash every new penetration, whoever cut it. HVAC, electrical, plumbing and solar crews are experts in their own systems, not in membrane flashing. Settle who flashes the roof before work starts, and put it in writing.
Most penetration leaks on newer roofs trace back to holes added after the roof was installed. A plumber adds a vent. An electrician runs a new feed to a rooftop unit. A sign company bolts a bracket through the deck. The penetration gets filled with spray foam or a tube of caulk, and the leak shows up months later, often far from where the water entered.
Warranties make this more than a workmanship question. Manufacturer warranties typically cover flashing built as part of the approved system and exclude damage from unauthorized rooftop work. Solar arrays are a common example, since every mechanical anchor is a penetration. We cover that in detail in installing solar panels on a commercial flat roof.
A simple process prevents most of these problems:
- Require any trade that needs a roof penetration to notify you before cutting.
- Group new pipes and conduit where possible, so one well-built detail replaces several small ones.
- Have your roofer flash the opening the same day it is cut, using the membrane manufacturer's approved materials.
- Photograph the finished detail and file it with your roof warranty records.
If you are vetting who should do that work, our guide on choosing a commercial roofing contractor in Texas covers the questions to ask first.
How often should commercial roof penetrations be inspected in Texas?
Inspect roof penetrations every spring and fall, plus after any hail, high wind or heavy rain event. In West Texas, the post-storm walk matters most, because hail and wind can open a penetration seal months before the next scheduled inspection.
On each walk, check every penetration for these signs:
- Split, cracked or chalky pipe boots
- Loose or rusted clamps, and butyl mastic exposed above the boot
- Pitch pan sealer that has shrunk, cracked, pulled away from the metal or stopped shedding water
- Open laps or lifted edges where flashing meets the field membrane
- New pipes, conduit or brackets nobody told you about
- Ponding water near a penetration or behind equipment
A visual walk shows where a seal has failed, not always how far the water has traveled. Water can run along the deck and through insulation before it shows up inside. If a penetration has been leaking for a while, an infrared thermal roof inspection maps the wet insulation so the repair covers the full damage, not just the pipe.
Frequently asked questions
Can I just caulk around a roof penetration?
No. Sealant protects the top of a finished flashing detail, but it cannot carry the waterproofing by itself, and it cracks quickly under Texas sun and daily temperature swings.
Does adding a roof penetration void my roof warranty?
It can, if the opening is cut or flashed without following the manufacturer's requirements. Check your warranty's language on rooftop alterations before any trade cuts the roof, and have the opening flashed by a roofer working to that manufacturer's details.
How far apart should roof penetrations be?
Individually flashed penetrations should be at least 12 inches from each other and from walls and curbs. Pipes that must sit closer together are better grouped inside a single sealant pocket or enclosure.
How tall does penetration flashing need to be?
On single-ply roofs, a pipe boot or wrapped flashing needs at least 8 inches of height above the roof membrane. A pitch pan should be at least 4 inches tall, with a minimum of 2 inches of crowned sealant on top.
Not sure your penetrations are sealed right?
Get a documented condition report with photos of every penetration, curb and flashing detail on your roof, plus a clear repair recommendation. Request a roof inspection or call (806) 404-1250.