What Is Rolled Roofing and When Does It Make Sense?
Rolled roofing is a budget option for sheds, garages, and porch structures with a low slope. It is asphalt-saturated felt covered with mineral granules, essentially a shingle compacted into a 100-square-foot roll, and it installs with roofing cement and nails rather than torches or specialty equipment. That cold-process method is why a lot of property owners reach for it on outbuildings: no extra gear, no subcontractor, done in a Saturday.
It is not a commercial membrane. It is not designed for large roofs, ponding water, or structures where a leak means operational damage. If that describes your building, skip to the When Rolled Roofing Is Not the Right Call section before you spend a dollar on materials.
For the right application, a detached garage, a workshop shed, or a small porch, it is a perfectly workable solution when installed correctly. The steps below are the correct way to do it.
Check Your Slope First: This Is Non-Negotiable
Slope requirements exist for a reason, and rolled roofing has a hard floor. The International Building Code (IBC 2018) sets the minimum slope for mineral-surfaced roll roofing at 1:12, meaning one inch of vertical rise for every 12 inches of horizontal run. Below that threshold, water does not shed fast enough, seams fail under standing water, and the roof fails early.
To measure your slope, hold a 12-inch level flat on the roof surface. Using a tape measure, check how many inches the surface drops (or rises) over that 12-inch run. One inch of drop equals a 1:12 slope. If your roof is flatter than that, rolled roofing is not the right material. Period.
Slope at a glance:
| Slope | Rolled Roofing | What to Use Instead |
|---|---|---|
| Under 1:12 | Not permitted by IBC | TPO, EPDM, or modified bitumen membrane |
| 1:12 to 2:12 | Permitted; use concealed-nail method | N/A |
| 2:12 and above | Full install; exposed-nail method acceptable | N/A |
If your flat roof is a commercial or multi-family structure sitting below 1:12, the correct solution is a single-ply membrane, specifically TPO or EPDM, not rolled roofing. A professional can slope the deck with tapered insulation and install the right system. That is a different conversation from what this guide covers.
What You Need Before You Start
Gather everything before you climb up. Stopping mid-install because you ran out of cement or forgot nails is a real way to get a seam that never bonds right.
Materials:
- Mineral-surfaced rolled roofing (MSR): measure your roof area and add 10% for waste and overlaps
- Roofing felt (15 lb. ASTM D 226, Type I or equivalent)
- Galvanized roofing nails, 11 or 12 gauge with wide heads
- Roofing cement: tubes for a caulking gun, plus a tub for trowel work
- Metal drip edge, enough to run all four perimeter edges
Tools:
- Utility knife with hook blades (standard blades dull fast on mineral-surfaced material)
- Hammer
- Tape measure and chalk line
- Trowel
- Broom or leaf blower for deck cleanup
One note on temperature: do not install below 45°F (7°C). The asphalt stiffens and cracks when you try to unroll it in cold weather. Warm days, ideally with a few hours of sun on the rolls before you start, make the material flat and cooperative.
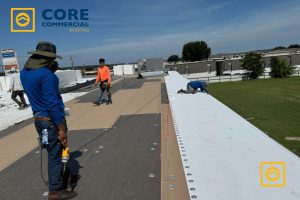
Step 1: Prepare the Roof Deck
The deck is where this job either gets done right or gets wasted. Everything above it is only as good as what it is nailed to.
Strip all existing material down to bare wood sheathing. Pull every old nail, because a nail head underneath your new roofing will eventually work through. Sweep the deck clean. Walk it and press your hand into any area that feels soft. Soft spots are rotted plywood, and rotted plywood cannot hold a nail. Replace those sections before you lay a single inch of new material. Installing rolled roofing over rotten decking is how a two-year-old roof starts leaking in six months.
Once the deck is clean, solid, and dry, install metal drip edge along the eave edges, which are the bottom horizontal edges of the roof. The drip edge tucks under the underlayment and directs water off the deck rather than letting it wick back under the wood. Nail it every 12 inches and make corner cuts clean.
Step 2: Install the Underlayment
Underlayment is your second line of defense. If a seam ever opens above it, the felt keeps water moving outward rather than sitting on the wood. This layer is also required under most building codes. The IBC specifies ASTM D 226, Type I or ASTM D 4869 felt as the underlayment standard for mineral-surfaced roll roofing installations.
Start at the bottom edge of the roof and roll the felt horizontally. Smooth out every wrinkle as you go, because bubbles trapped underneath will eventually push up through your finished roofing in the heat. Secure with staples or roofing nails every 6 to 8 inches along the edges. When you start the second row, overlap the first by at least 2 inches. Water always flows downhill, so the upper row laps over the lower, never the other way around.
If you are in a climate with ice or hard freezes, your code may require a self-adhering ice and water barrier at the eaves. Check local requirements before you staple anything.
Step 3: Lay the First Sheet
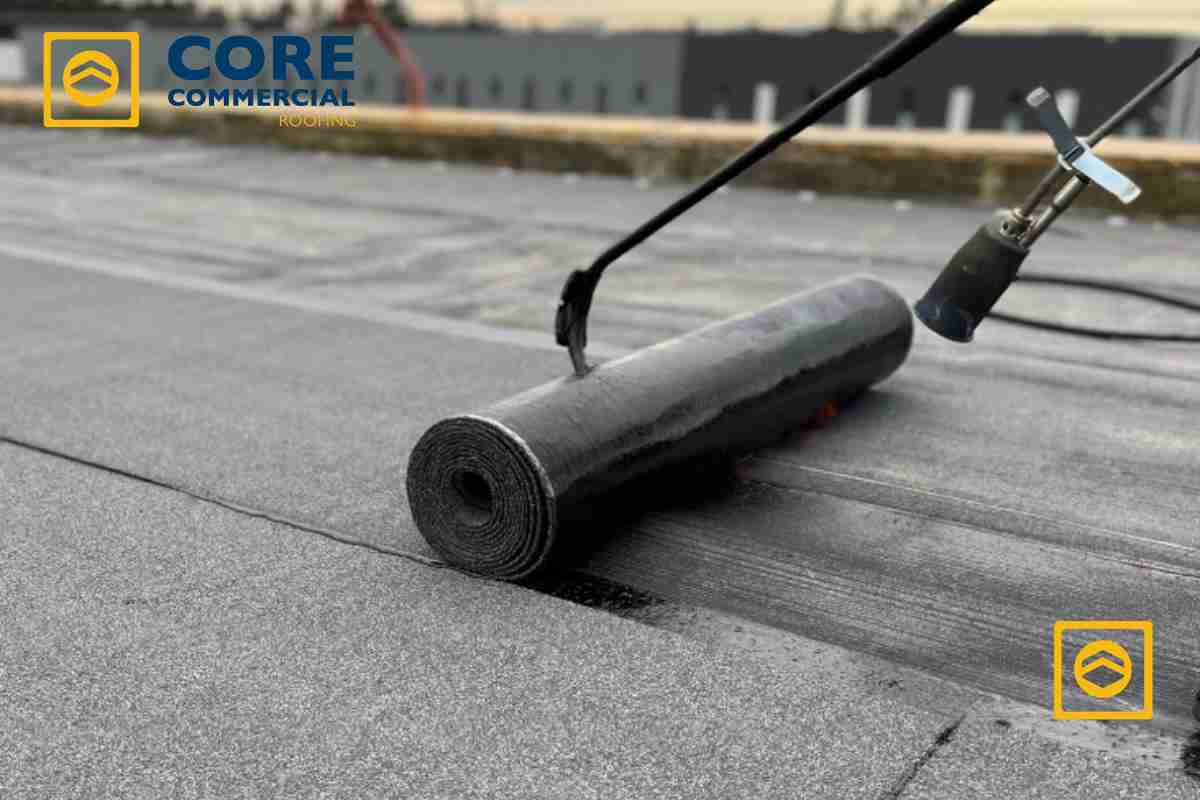
Before you carry the rolls up, unroll them flat on the ground and let them sit in the sun for 20 minutes. A roll that just came off a truck is stiff and wants to curl back on itself. Twenty minutes of warmth relaxes the asphalt and makes the sheet flat and easy to handle on the roof.
Position the first sheet at the lowest edge of the roof. It should overhang the drip edge by about 1/4 inch, just enough to shed water cleanly over the metal edge without hanging down far enough to catch wind. Keep it square to the eave. If the first sheet goes in crooked, every row above it compounds that problem.
Nail it down along the top edge every 6 inches, and along the sides every 6 to 12 inches. Use the chalk line to mark where the top of the next sheet will overlap this one before you set the next row.
Step 4: Seal and Overlap the Seams
Seams are where rolled roofs fail. Get this step right and the roof performs. Rush it and you will be back on that roof patching leaks inside two years.
For each new sheet above the first:
- Mark the overlap. Position the new sheet so it overlaps the previous one by at least 2 to 4 inches. Most MSR products have a factory-printed selvage line showing exactly where to align. Use it.
- Apply the cement before you nail. Lift the leading edge of the new sheet. Spread roofing cement with your trowel across the full width of the overlap zone, with no gaps and no thin spots. The cement is the primary water barrier at the seam. Skimping on it is the single most common reason DIY rolled roofs leak.
- Press and nail. Press the sheet firmly into the wet cement, working from one end to the other to push out any air pockets. Drive nails through the overlapped area every 6 inches.
Always work up from the bottom, with each upper sheet lapping over the one below it, just like shingles. Water flows downhill over every seam, never into one.
At vertical edges (rakes), cut the roofing flush, then apply a bead of roofing cement along the full length before installing the rake-side drip edge over it.
Step 5: Finish and Inspect the Edges
Once all the field sheets are down, walk the entire perimeter.
Install metal drip edge over the roofing material on the rake edges, which are the sides of the roof. Nail it down and cover every nail head with a dab of roofing cement. Then do a slow pass over the whole roof looking for anything you might have missed: exposed nail heads in the field, corners where sheets did not fully bed into the cement, and any area where the roofing lifted slightly during install. Hit all of it with cement.
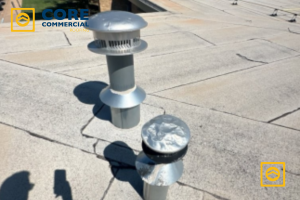
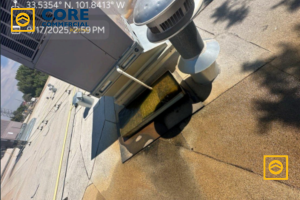
Pay extra attention to any roof penetrations, including plumbing vents, HVAC curb edges, and wall transitions. These are the spots where water finds a way in. Apply roof cement at every penetration, worked up under the flashing edge by at least 4 inches.
If your structure has gutters, check that the drip edge directs water into the gutter trough cleanly and that no gap exists between the drip edge and the gutter lip. Any gap there will eventually rot the fascia underneath.
When Rolled Roofing Is Not the Right Call
A lot of property owners assume that because their building has a flat roof and rolled roofing is cheap, the two belong together. That is not always true, and knowing when it is wrong saves money in the long run.
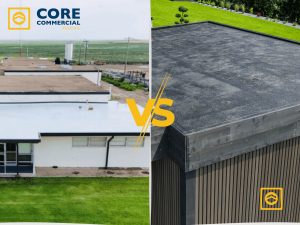
Structures over roughly 1,000 square feet. At that scale, the labor to install rolled roofing and the material cost start closing in on the price of a TPO or EPDM membrane. A single-ply membrane installs faster on a large footprint, comes with real manufacturer warranties, and has a service life of 20 to 30 years versus 5 to 10 for MSR. The math shifts quickly.
Any roof slope below 1:12. As covered above, this is a code issue, not a preference. Below 1:12, water does not drain fast enough for MSR seams to hold. Common commercial roof issues like ponding water are exactly what destroy rolled roofing prematurely on under-sloped structures.
Buildings with HVAC equipment on the roof. Every penetration is a seam failure waiting to happen with rolled roofing. Commercial roofs with rooftop units, condenser pads, and curb-mounted equipment need a membrane system with proper counterflashing details, not roofing cement troweled around a curb.
After hail damage. If your existing flat roof took a hit in a West Texas hailstorm, rolled roofing is not a repair material for that scenario. Hail damage on a commercial roof requires a proper damage assessment and, depending on membrane condition, either a targeted repair or a full commercial re-roof.
If your project falls into any of those categories, give Core Commercial Roofing & Coatings a call at (806) 404-1250. We cover Lubbock, Midland, Odessa, Amarillo, and the surrounding West Texas, and we will tell you straight what your roof actually needs.